Not all clients are 100% set in their all-year-round gym habits. As such, some of them will want to train outdoors at times, while others will end up spending weeks and months in their summer house or similar with no proper gym equipment nearby. But you can maintain and even build better strength, health, and fitness with an outdoor gym, calisthenics and bodyweight focused fitness plan if you just know how to plan and execute it properly.
Welcome to a proven, and fact-based bodyweight, outdoor gym-based fitness plan from Strength By Fitness.
This is day three of Strength By Fitness 3 day strength training Per Week: Bodyweight and outdoor gym Plan.
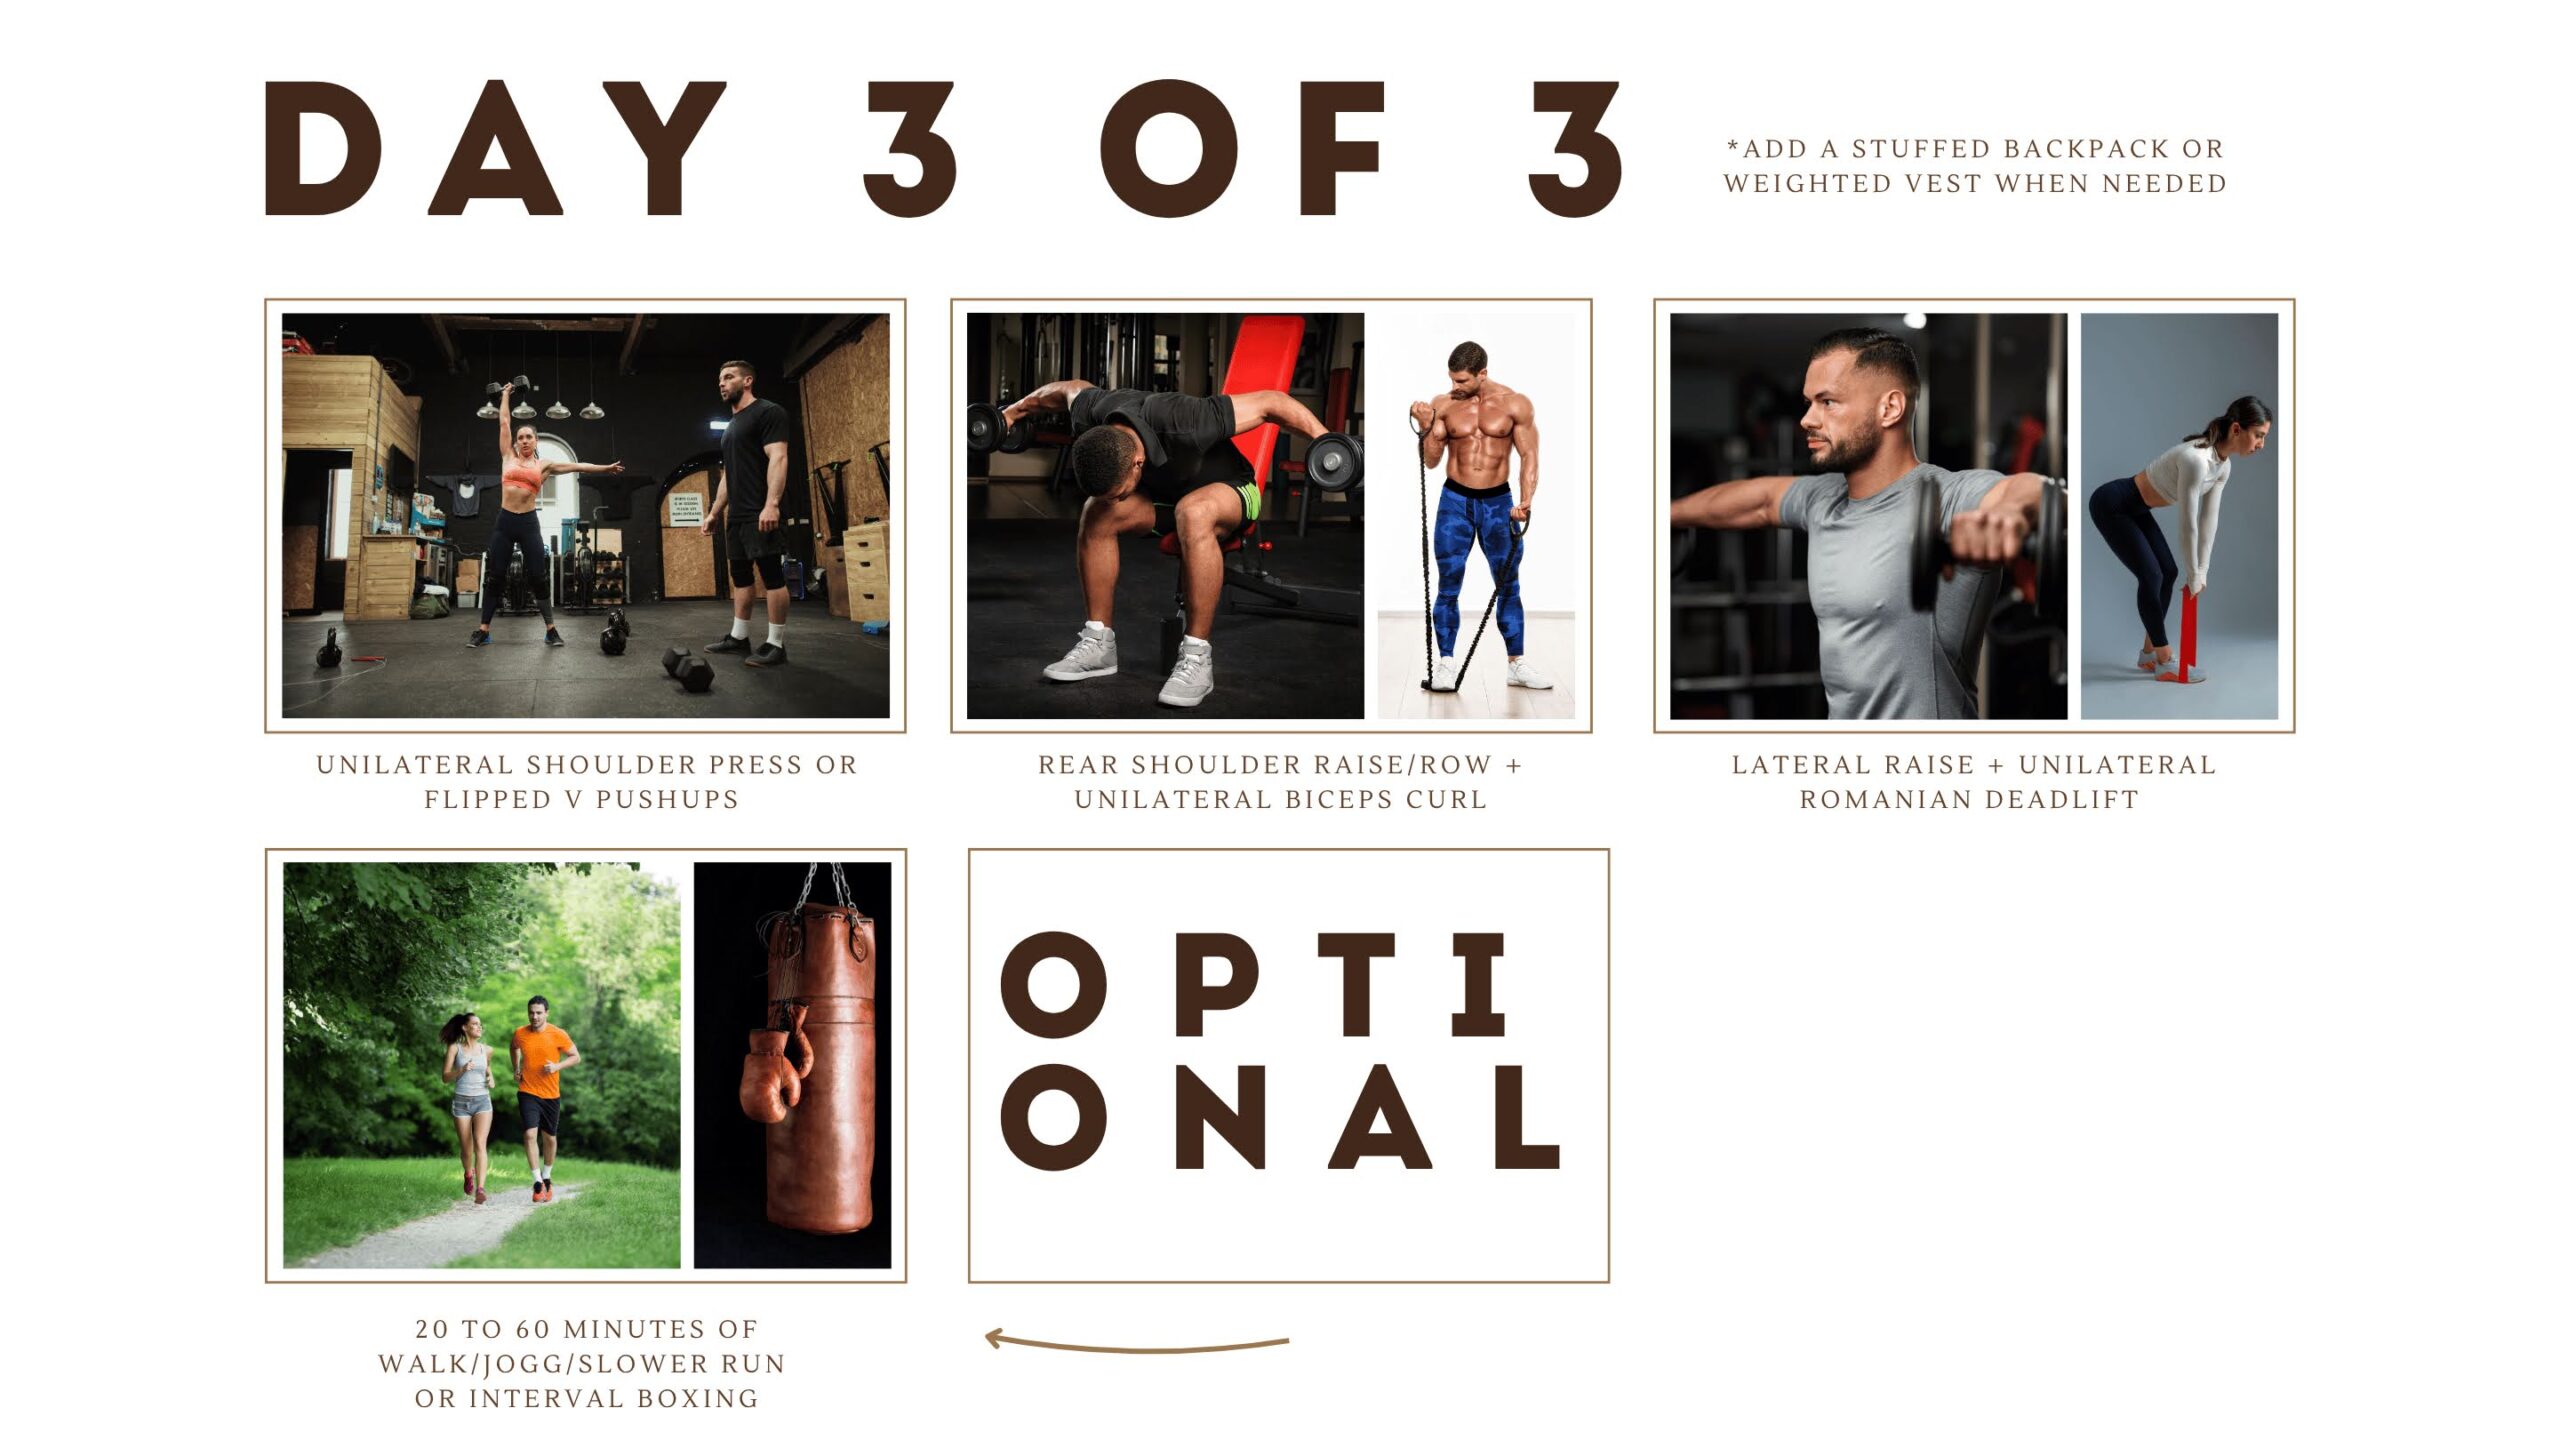
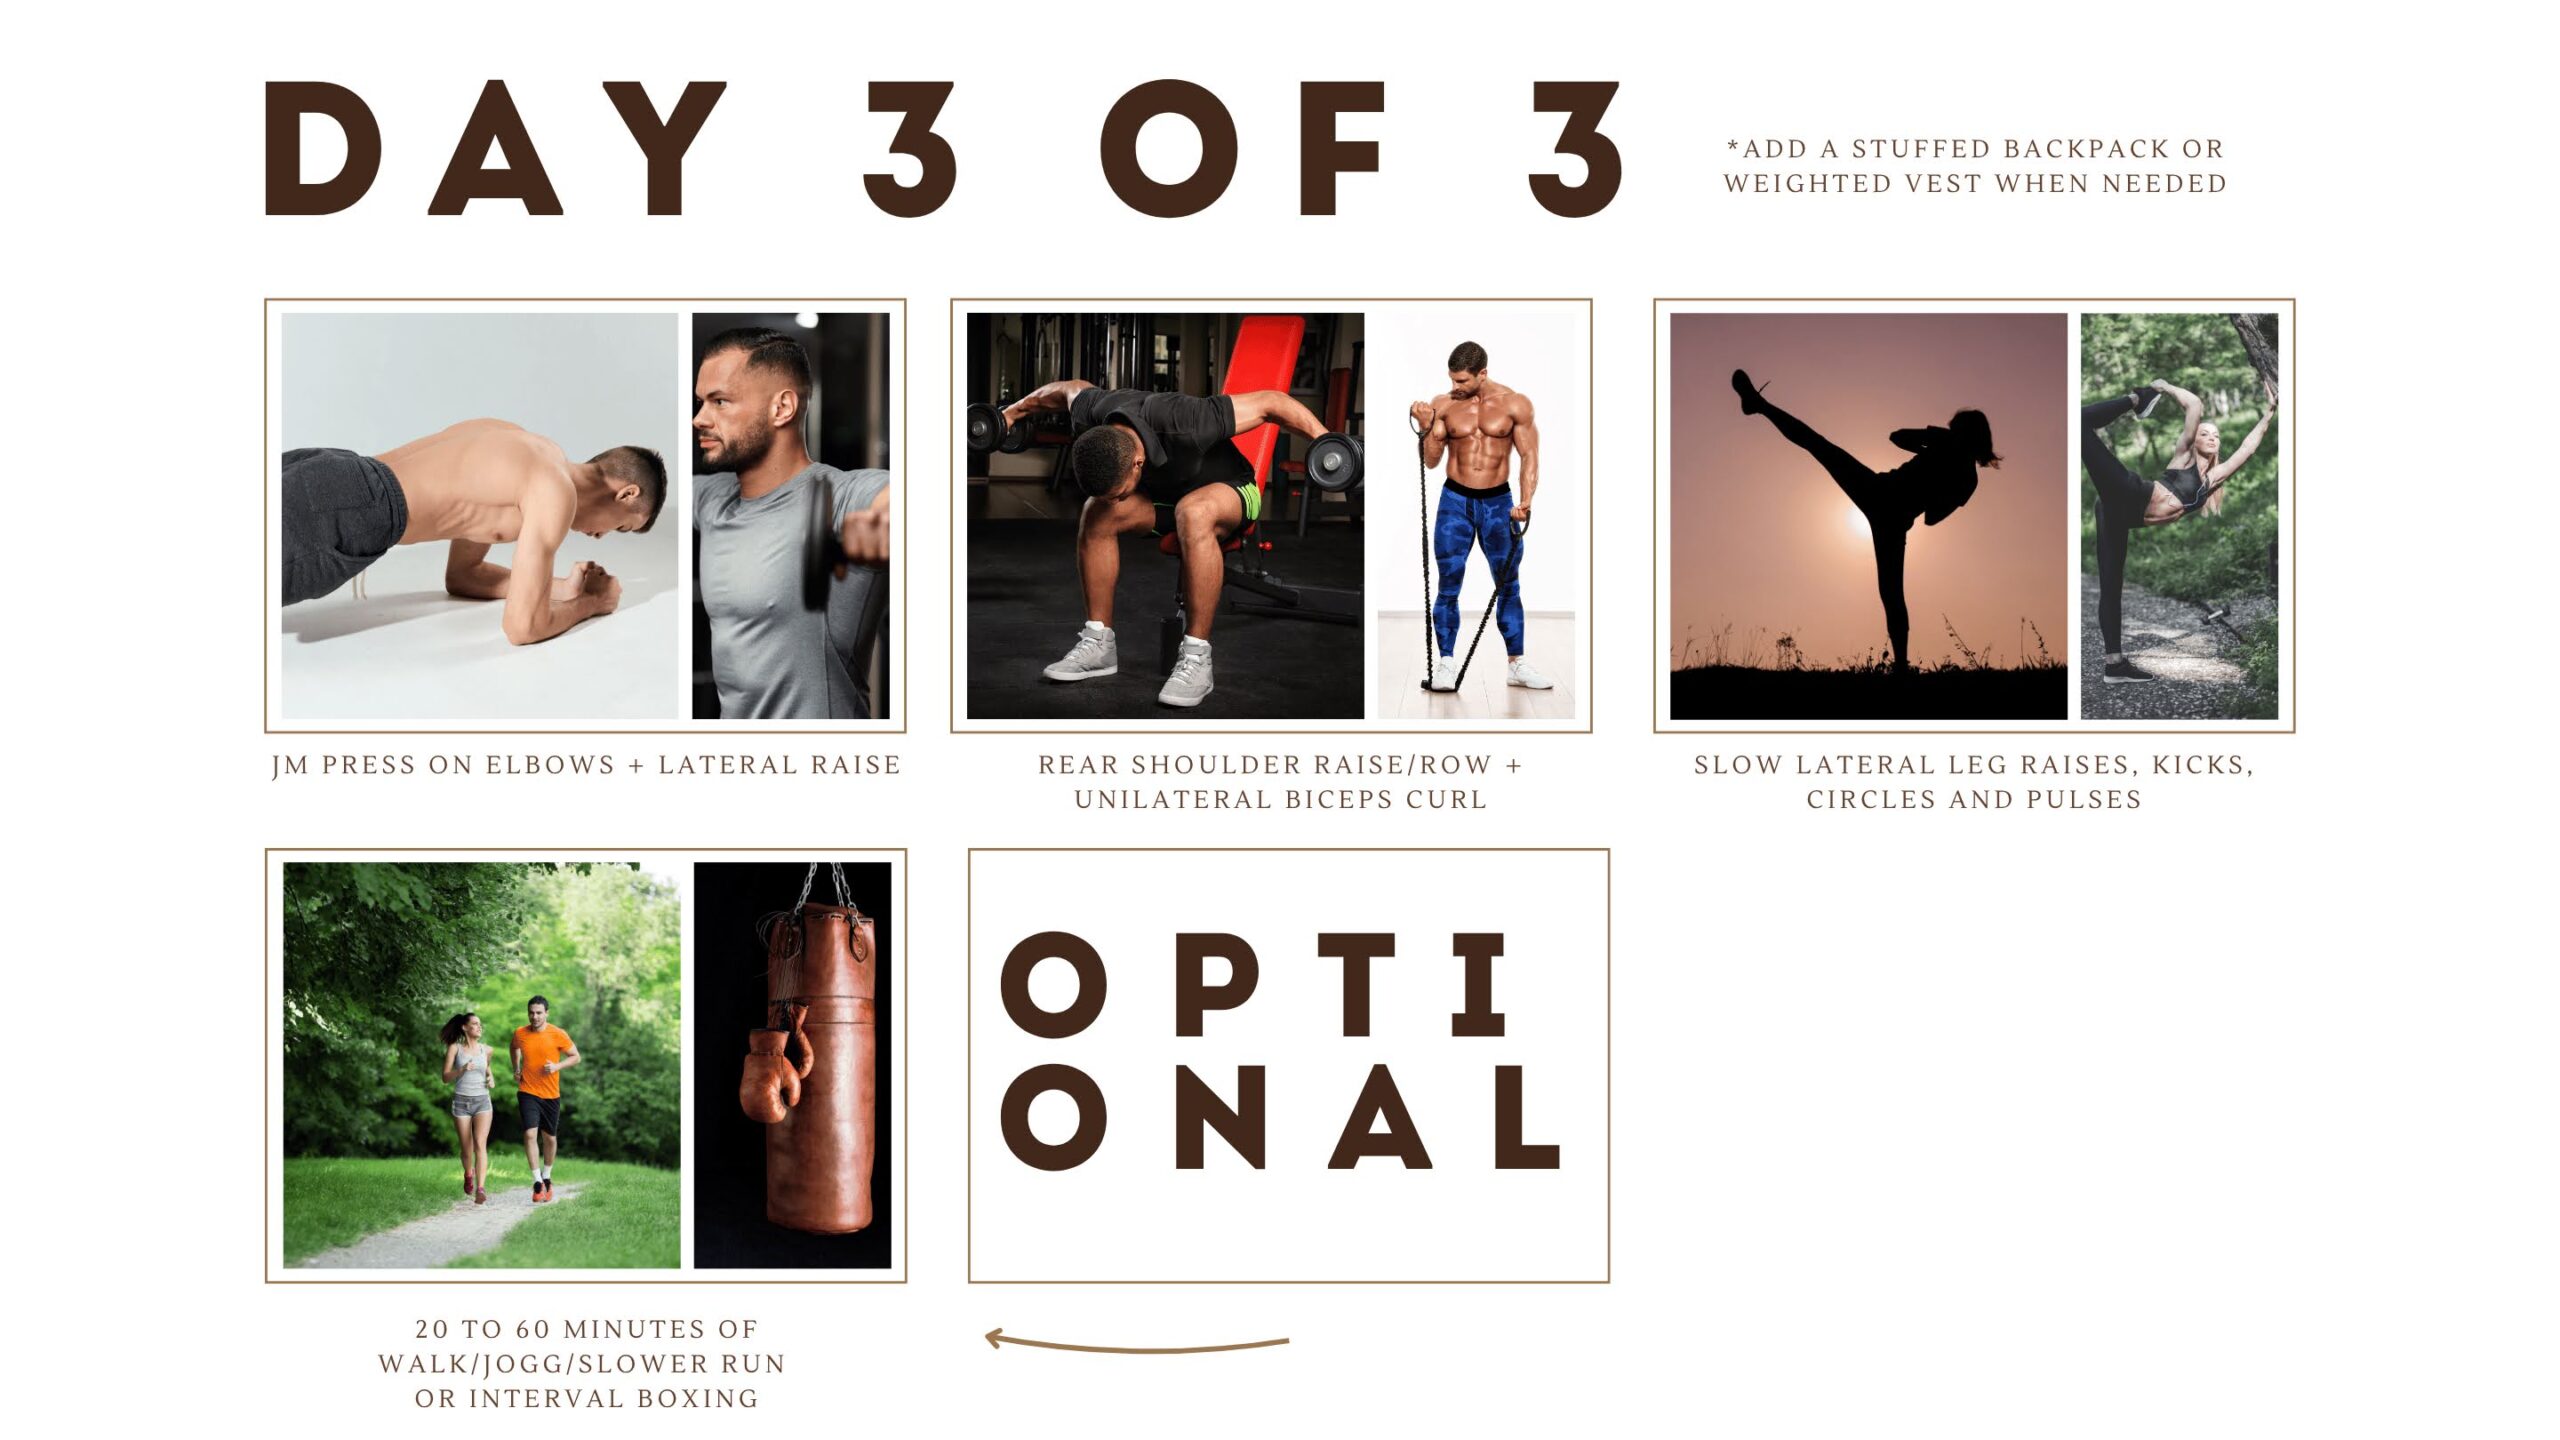
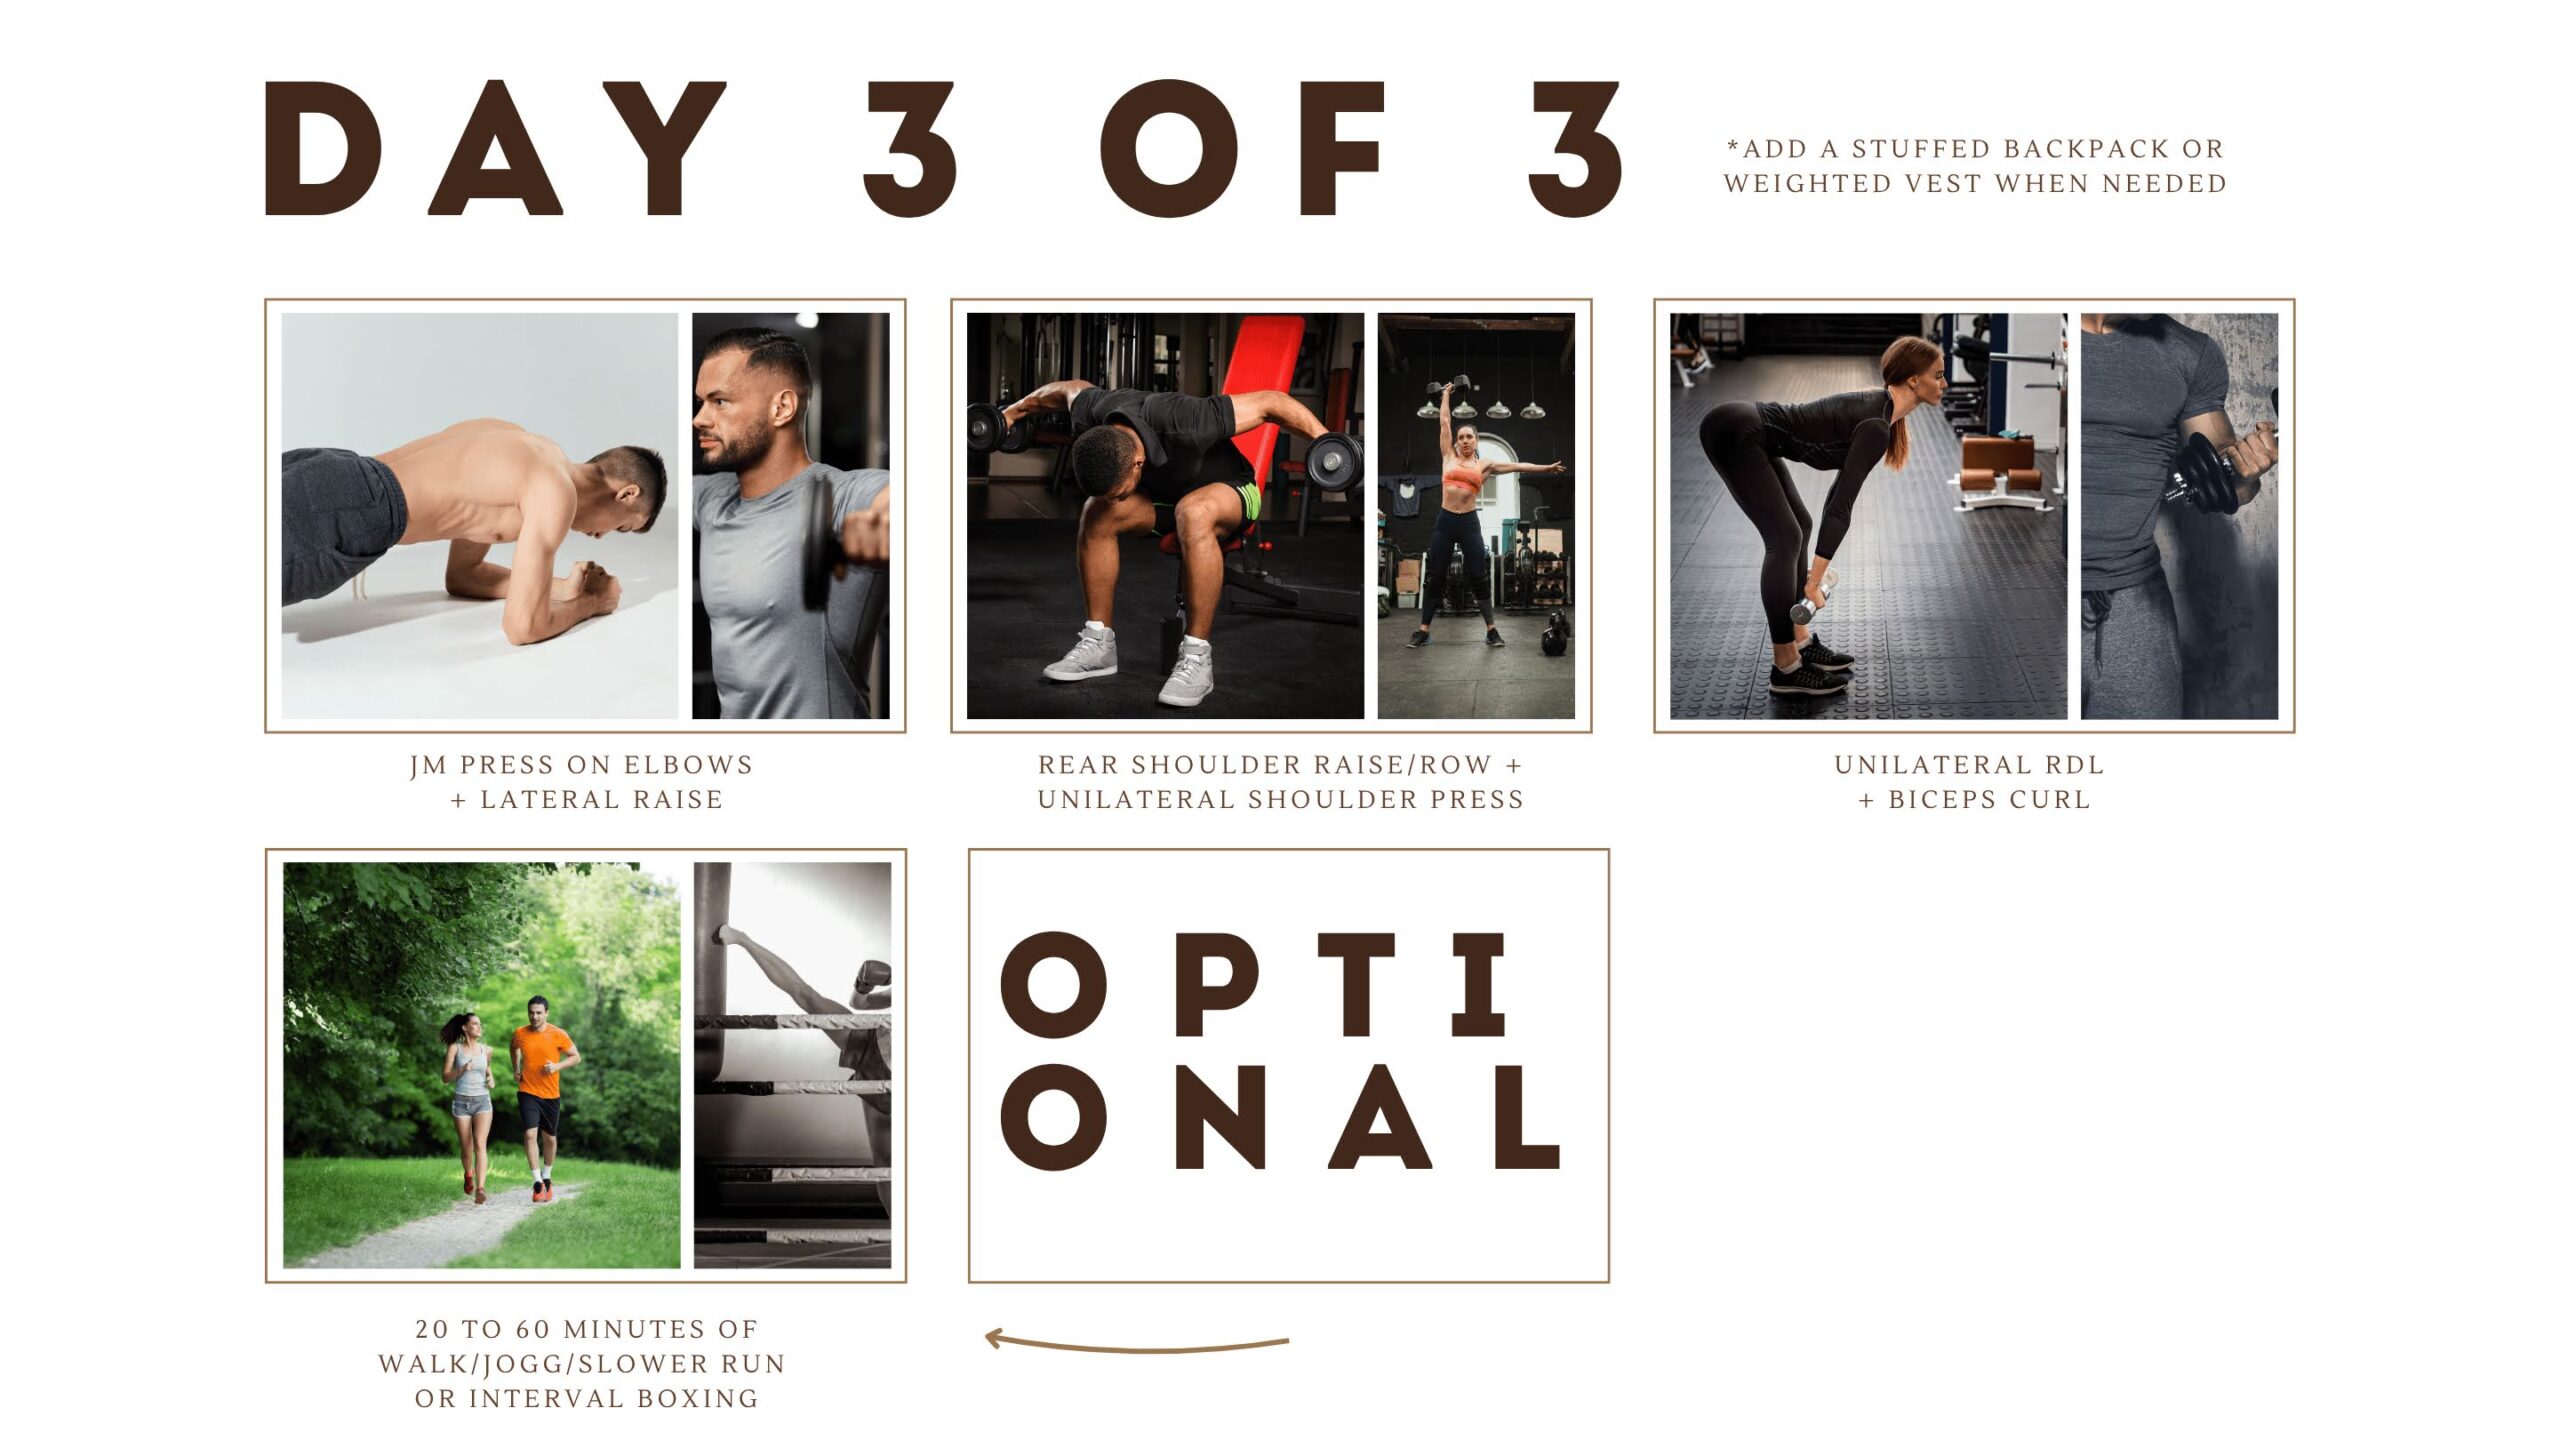
Like with the first two days in this plan you have several different versions of day 3 available to choose from
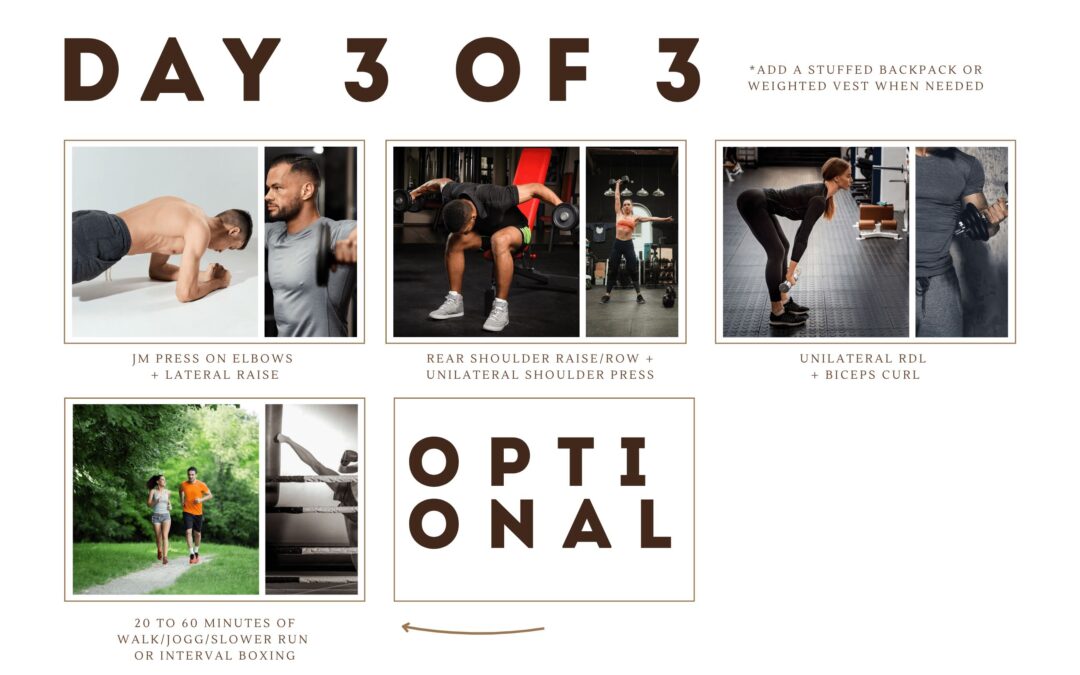
Exercise Group 1
Unilateral standing shoulder press
3 set
RIR 0 to 4
Rest time between each set.
2 to 6 minutes of rest
Some Coach input on our first day three exercise.
As always with Strength By Fitness, rock-solid fitness plans, you will find several versions of day 3. Pick and choose the day 1, 2, and 3 variants that are right for you, and build the perfect workout week.
RIR 0 to 4.
RIR 0 to 4 is once again the go-to reps in reserve. Yes, this is how mundane and repetitive it is to build vastly better health, fitness, and body composition outcomes across decades of time.
You rarely stray from the fact-based foundation; it's just an endless, lifelong cycle of repetition. And when you fall out of those habits, you get back to them as soon as possible.
Having said that, at times, private clients do get to do periodic deload phases, not scheduled, but when it's actually needed.
When it's needed and how frequently this happens will vary wildly from person to person.
Why is it needed, and why shouldn't it be scheduled?
Because you can't always bang the drum of peak performance effort without running into bad wear and tear, and slowly increasing injury risk with increasingly diminishing returns.
At least not when we consider many years of maintained exercise and good progress.
Eventually everyone that does fitness and nutrition good enough, will reach such a high level of exercise performance that it starts to be needed ( and very beneficial ) to spend periods of time at a lower level of performance too, raising the floor of our fitness valley instead of trying to always push the peak of the mountain even higher up.
Back to our workout, in the final work set, for all exercises today, push hard for that RIR 0 to 1 set and really bring the effort, folks.
Progressive overload.
The nifty thing is that if you do not have access to a range of kettlebells and dumbbells at home, that weighted backpack is the perfect tool to manage your standing shoulder press.
Grab that backpack by the straps, and you will see that it's the perfect adjustable dumbbell. Yes, it's bigger and funny looking, but it works, and it will allow you to progressively overload all of your bodyweight exercises over time.
So who cares that it's a strange-looking dumbbell :).
Coaching cues for the unilateral, standing shoulder press.
Shoulder wide is the real deal; it provides a stable foundation for a big press. But you should adjust the exact width to what feels the best, most stable, and strongest for you.
Line up the hips, the elbow, the shoulder, and the hand in one vertical line.
This is the safest and strongest line to press in generally speaking.
Keep a tall and proud body, from feet to head, pretty much straight as a tall, proud tree.
Unlike the cues they give you in the exercise video, I am not going to coach any clients to always press at a 45-degree angle.
Always adjust your angles to what's most comfortable for you, and this goes for pretty much every exercise there is.
Personally speaking, I prefer to do my standing shoulder presses with my elbows tucked between 0 and 45, unlike the 45 to 90 degrees most have been conditioned to do it, due to how most shoulder press machines are built that way.
That tip about adjusting angles to your personal comfort applies to how straight you keep your torso, too.
For most people, it's a wonderful foundation to go with a straight spine, from feet, hips, shoulders, all the way to your pressing hand. But, some mobility is not just allowed, it can also be beneficial.
Especially as you get more advanced and strong.
It's like the deadlift, a neutral spine is a great foundation, but many advanced lifters have some level of rounded backs, and many protract their scapula and lats instead of retracting them pre-lift.
So learn to do it the safe foundational and general way most are taught early on by us personal trainers. It works, its safe, its good. But as you get more advanced, allow some individual body english. And most importantly since every in person client is unique, never look at another personal trainers client and assume they are being taught the wrong way to do something, just because that client might get different cues than you.
Bodies are unique, and goals and needs can frequently vary too. Great personal trainers take this into account even with novice lifters. So general technique is a good, safe foundation, for most. But its not the only safe and good way to do any given exercise, and frequently not whats best for a specific client.
Bottom position, standing shoulder press.
Elbow close to your body in the bottom position, I tuck my right elbow right into the area of my appendix, and let that weight sit down right at your shoulder/collarbone area if you have the mobility for it.
Hands can be neutral or pronated, all depending on what feels best for you. Yes, you can even press with a supinated hand position, but few will prefer that for the shoulder press.
Start each rep by bracing your core, and gluteus, breathe in before you push straight up.
For a barbell we lean our head slightly back to make room for the barbell to pass exactly where our jaw used to be. As the barbell push above our head, we move that head back into the straight vertical line and push onward to straight arms. And for obvious reasons, on the descent you then have to slightly tilt your head back, again to make room for that descending barbell, or get used to a bruised head and a very short range of motion for your press :).
With the use of dumbbells, kettlebells and our amazing, weighted backpack the art of head tilting for the overhead shoulder press is not an issue. You are pressing close to the front, side of your head in the perfect vertical line so no real tilting is required.
Top position of the standing, over head shoulder press.
Breathe in, and press straight up to a straight arm and body once the weight pass your head.
Stay tall and proud all the way from your feet, through your spine, pressing arm, and weight.
Unless you are a competitive strongman, try not to lean too much in any direction as you press the weight above your head.
Keep that spine and vertical pressing line fairly straight from toe to head and weight.
From the top, lower it back down in a controlled way all the way to the start. Breathe in, and let it hang there for a second or two.
Repeat until the proper RIR and keep your core and gluteus engaged throughout the entire set.
Muscle activation for the OHP.
Primary activation happens in your shoulder muscles, mostly the anterior and side delts.
But triceps and chest will be heavily engaged too, and this is great so not a concern at all.
Isolating muscles have its place, but for most people isolating specific muscles is overkill and more often than not a waste of precious exercise time and energy. Spend your effort and exercise time on engaging as many muscles and motor units per rep and set, in every single exercise you do.
Lesser stimulus will also happen in your entire core, back, hamstrings, and glutes too. Yup, thats the benefit of standing up while you press big ass weights over your head, even your lower body and that organ shielding core has to work to keep you upright and provide safe, stable power and foundation to work from for the muscles thats doing the mighty pressing.
.

Super Set Group 2
Bent over, Rear shoulder raise
3 set
RIR 0 to 4
Standing biceps curl
3 set
RIR 0 to 4
Rest time between each super set.
2 to 6 minutes
Some Coach input for exercise group 2, day two.
Our rear shoulders get a lot of stimulus from all forms of row and deadlift variations.
But that's great.
This means that you do not have to kill yourself with this exercise on the one hand. On the other hand, I have always found the rear shoulder exercises to transfer really well into all the other posterior chain muscles, too.
Plus, the posterior chain recovers incredibly well, so don't be afraid of pushing the effort; it's just 3 sets in total after all, despite the recurring partial stimulus from all 3 gym days for your posterior chain.
RIR 0 to 4, rear shoulders and biceps curl.
RIR 0 to 4 is, as always, in play, but the rear shoulder and the upper back, which will also get activated, handle effort, load, and volume really well.
So why not try to take that RIR closer to 0 if you are usually hanging out at the 3 to 4 RIR? Give yourself a feeder set to get warm with a smaller weight if available, and as always, when we do feeder sets, use a non-exhausting RIR no matter the weight used.
But after that non-exhaustive feeder set, go as close to RIR 0 as you can. It's the last exercise day of the week for you and plenty of recovery before your first gym session of the next week.
You can also apply my favorite way of doing rear shoulder raises.
I use the square row where I use big weights and a cluster set approach. I stand in a square, hip-hinged, bent-over position, and do one big, heavy rep at a time, stretching the lengthened position for 2 to 3 seconds at the bottom after the negative descent, and then I dead stop it by putting the weight back down on the floor.
I breathe in for a handful of seconds before I do the next rep.
One rep at a time until I hit 12+ reps despite it being a big ass load.
This provides an amazing amount of stimulus for your rear shoulder, entire upper back, rotator cuffs, and overall a phenomenal strength progression, and lean mass outcomes too.
For biceps, I approach it strictly and nicely instead; it's the one muscle that really doesn't need big loads, because it's involved in all your heavy rows and pulls, and it just seems to like strict and nice direct work instead of also doing your direct biceps work big and heavy.
But that's just my own approach as a personal trainer and lifelong athlete.
Load, bodyweight, and higher.
Rear shoulder raises with that square bent over stance is a dream come true for your weighted backpack, dumbbell, so fire away.
Injury risk is very, very low for this exercise, no matter how big you go with the weights. Just learn to pull/swing without excessive impact going through tendons and insertions.
Yes, you can do it nicely and controlled with smaller weights too. That always works.
And when I say bigger weights and explosive pulls, we are still not talking about sloppy, injury-prone technique.
There's nuance there.
I am solely telling you that you do not have to worry about pushing your muscles with some effort and load.
Our posterior chain handles a bigger effort and load a lot better than our anterior upper muscle groups, generally speaking.
Use that to your advantage, while still keeping things controlled and strict enough to elicit good injury-free stimulus and progression over time.
Coaching cues, bent-over rear shoulder raise.
Roughly shoulder-wide stance, bend forward in your hips, slightly bent knees.
At this point, you have two options.
Either raise your upper body so you can pull the weight straight off the floor from an almost straight arm with just a slight bend in your elbow. This is my favorite way of doing heavy rear shoulder raises/rows.
The other is to raise your upper body even further and do all consecutive reps off the ground.
Both ways of doing it work, and they are both really good options. The off-the-ground version will require slightly less power, explosiveness, and load.
From either top position, start the lift by breathing in and bracing your core.
Pull and swing the weight to the side of your body by pulling it off the ground with your rotator cuffs, rear, and middle shoulder muscles. Control the lift and don't just blindly swing the weight like crazy, but do pull with explosive intent.
Take control of the arch as you approach the top.
Control the descent, all the way down to a position where your hand and weight are in front of your body, and if it's done unilaterally, let that weight travel over the center line.
Breathe in and let it hang there in that lengthened bottom position.
Regroup for a second, two, or three and do the next rep.
Muscle activation is primarily the rear shoulder muscle. But the middle also gets proper stimulus, as do your rotator cuffs. Lats are involved too.
To a lesser extent, there´s stimulus in traps, rhomboids, gluteus, quadratus lumbarum, and possibly even your hamstrings.
I am mentioning these additional, less thought of muscles at times, because when we push the envelope in any exercise, we get so much more muscle activation than people realize. A properly loaded seated row stimulates around 80 muscles with every single rep.
Unless you are a high-level athlete, rehabing, or prehabing, most people benefit strongly from embracing that max stimulus philosophy in almost all of their exercise choices and execution. And in most of those cases, the same still applies most of the time.
Unilateral biceps curls.
Very little needs to be said about the unilateral biceps curl.
Your mighty upper arm muscles, the biceps brachii, brachialis, and brachioradialis, get a massive amount of stimulus from your pullups and rows. So the unilateral biceps curl is just the cherry on top of your protein drink.
The fourth muscle in the anterior upper arm, the coracobrachialis, actually gets activated by push exercises, such as dips. So it's not part of the unilateral biceps curl stimulus despite its location in the anterior upper arm.
Stand tall and proud, curlingyour arm close to your body.
At the bot,tom start with a neutral hand position, with your palm facing the side of your body.
From there, breathe in, brace your core, and start by curling your hand to a supinated position youour move your hand upwards towards your upper body.
No need to move your elbow forward, you can tuck it in close to your upper body and just curl the lower arm and weight up and down.
It is, however, allowed to have some movement in your elbow. But no benefit to an exaggerated elbow movement.
Keep momentum controlled. Your biceps muscles get their big load stimulus from all those other explosive exercises, so this movement pattern is best left isolated and controlled.
Muscle activation is mainly in the biceps brachii, brachialis, and brachioradialis as mentioned above.
But your front shoulder, and even triceps and chest, get some activation too.
Pro tip.
If you really want to maximize your three biceps, add a set or two of hammer curls while you are at it. Thats a regular biceps curl, just with your hand kept in the neutral position all the way through your entire curl, up and down, rep after rep. The regular curl and hammer curl simply activate different primary muscles in your upper arms three big anterior muscles.
.

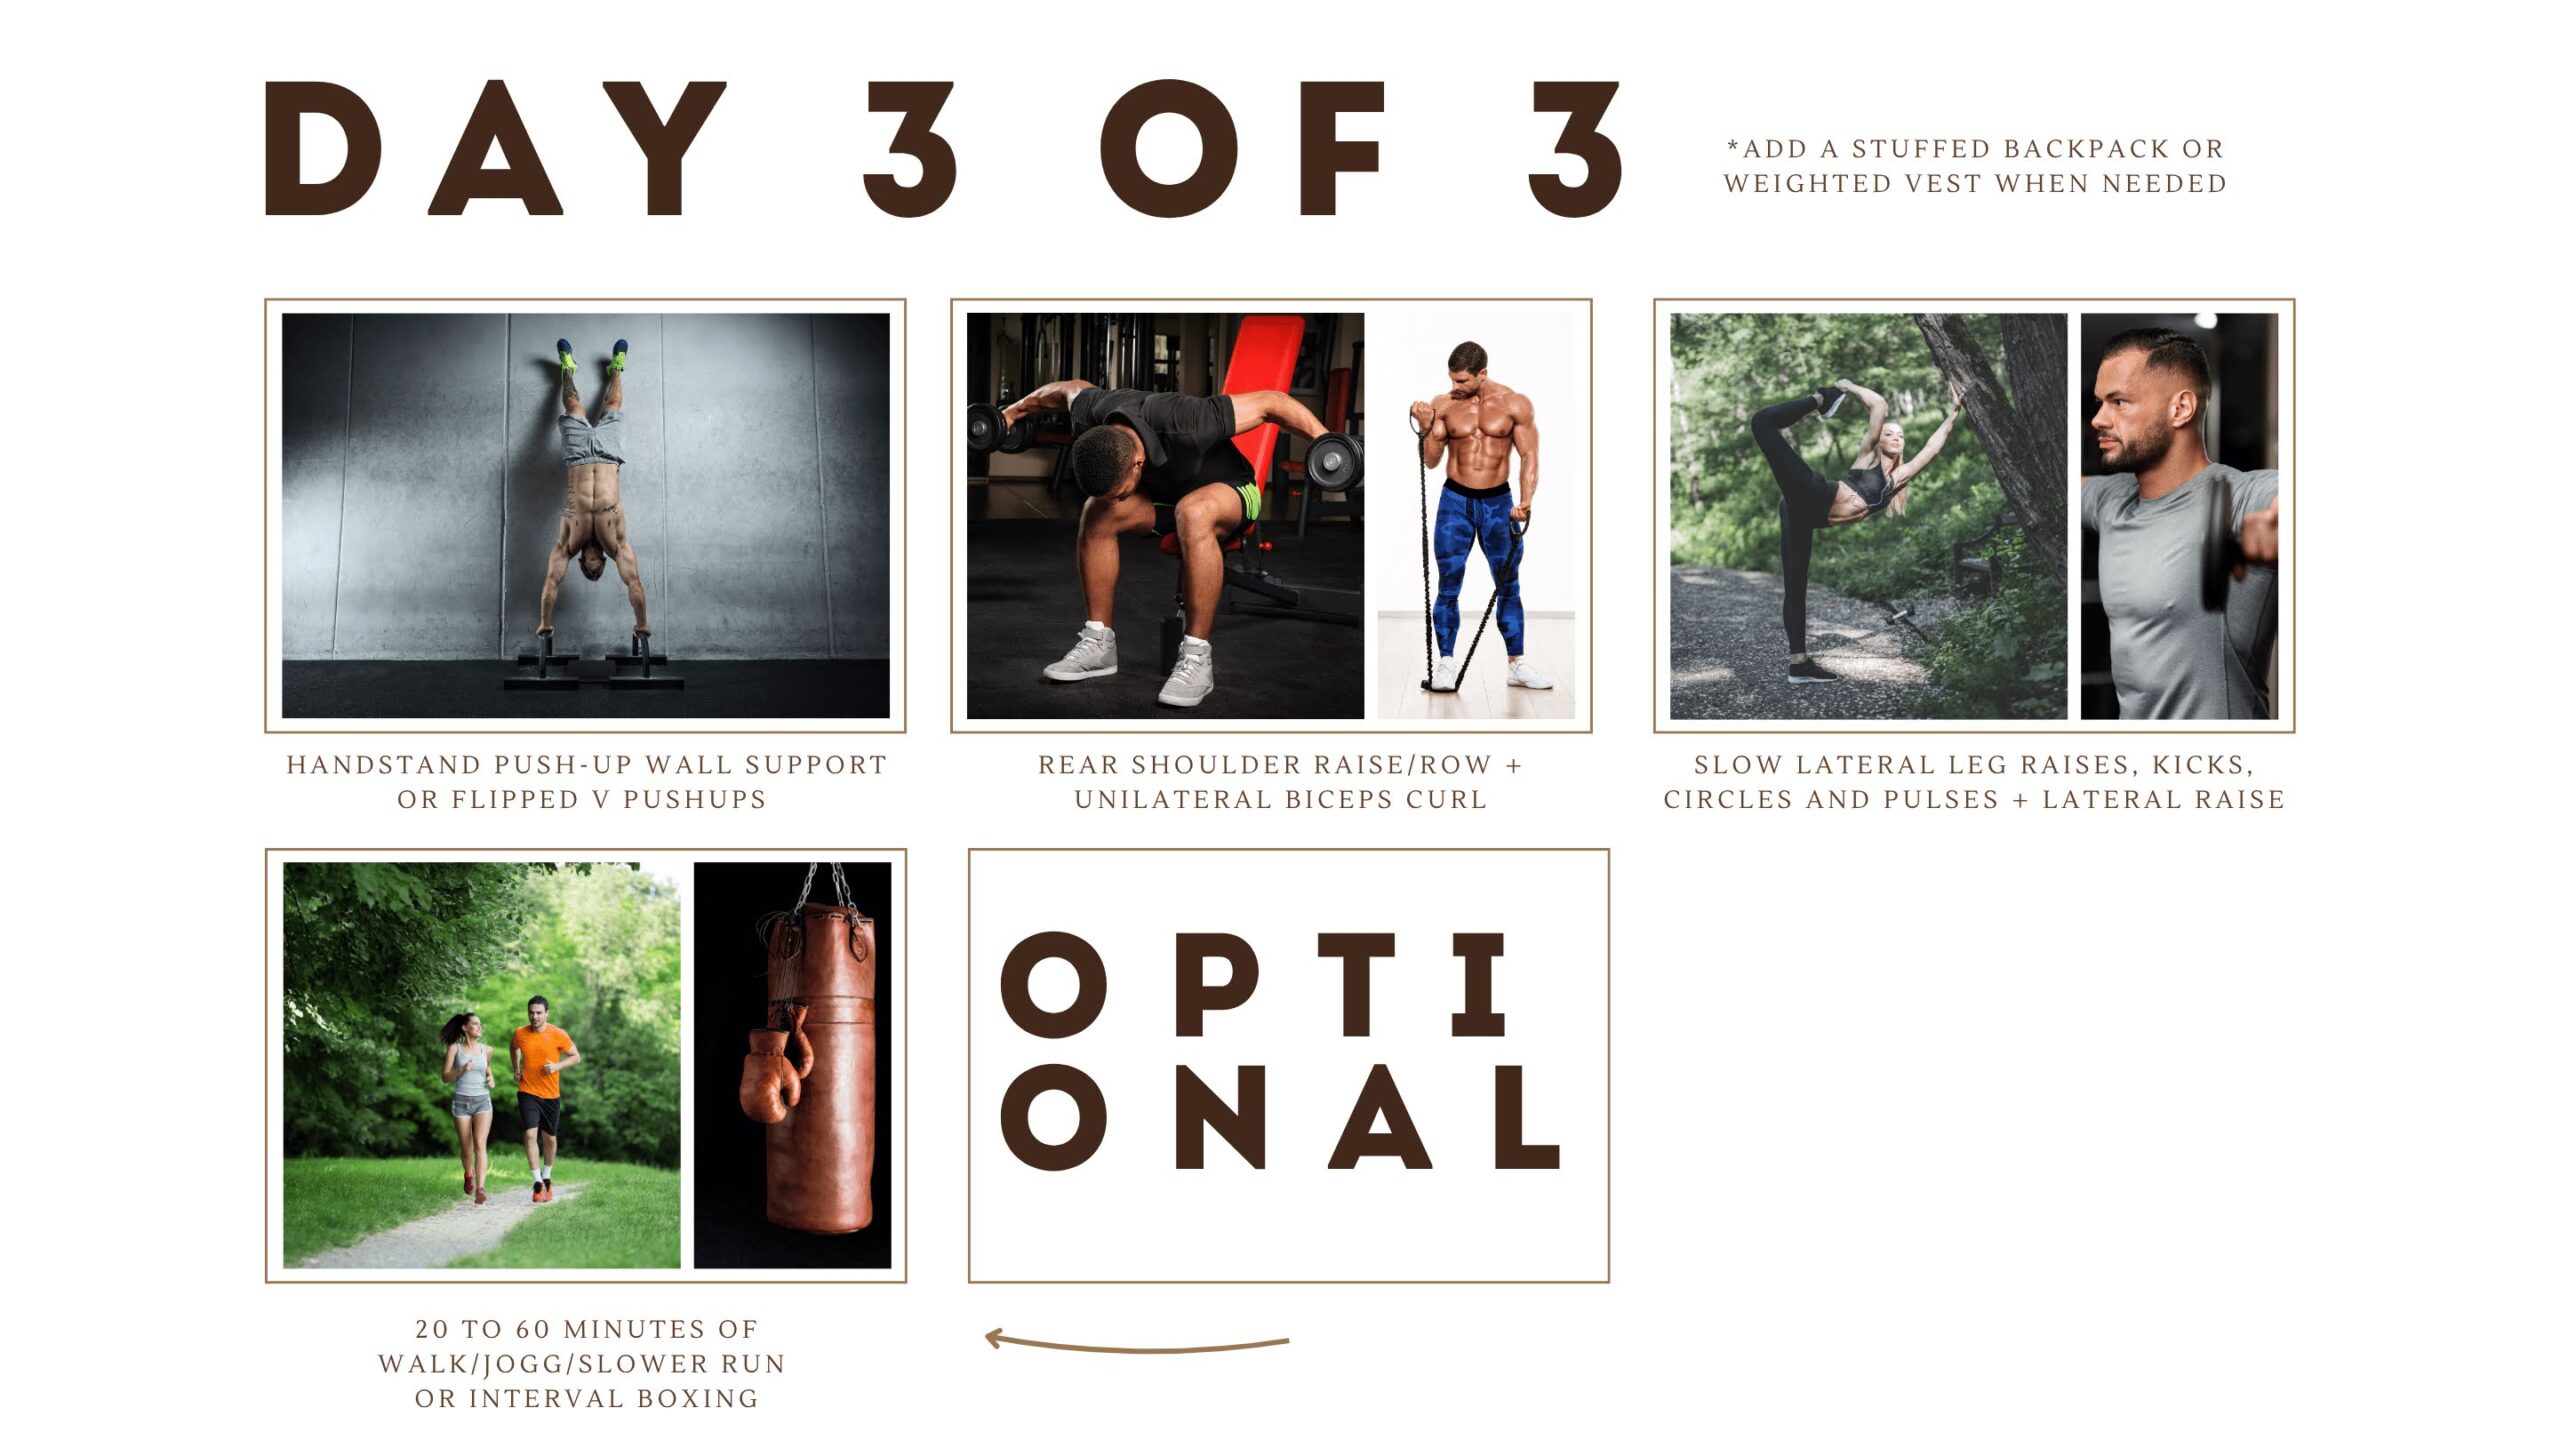
Exercise Group 3
Standing shoulder raise
2 set
RIR 0 to 4
Unilateral RDL
2 set
RIR 0 to 4
Rest time between each set.
2 to 6 minutes
Some Coach input for our mighty day three exercise group 3.
Neither of these two exercises is new for you. You have encountered both of them earlier in our workout week, but here they are again.
Come tomorrow, you will have a rest day, so go hard with your final strength training group for the day and week.
Closing out your exercise week on a high note is a major win you get to do perpetually!.
Load, bodyweight, and higher.
The last shoulder exercise of the week opens up for taking your final set beyond failure.
So if you are game, do those explosive contractions, and controlled negatives, full range of motion, all the way to an RIR of 0. Once done, just keep going and do a few more shorter-range lateral raises, because you are still working your shoulder and rotator cuffs, so just keep swinging away.
Now, keep going for the next rep, and the next rep until you reach further beyond RIR 0.
Coaching cues, the unilateral RDL.
Brace your core properly, and ground your feet from toe to heel.
Assume a square, hip-wide stance, and hip hinge down in a deep forward bending stance with your upper body kept straight and tall, while you hip hinge your upper body forward, push your gluteus backwards.
Keep your spine fairly neutral.
What this will do for you is extend your leg so there is much less of a knee bend compared to a squat or traditional deadlift.
It will also straighten and extend your upper body.
Some people do this freestyle because that's how good their balance is. I recommend clients to do this right next to a wall or machine or something else that's sturdy enough to provide some sort of balancing support.
I prefer this approach compared to the freestyle, no matter how good your balance is, because you are here to lift, not to play balancing games.
For the weight, I want you to try and have the weight travel close to your body, and most importantly, close to the grounded leg that's doing all the hard work.
Your other leg can either travel up into the air behind you in an arch, or you can place it half a step behind you and keep it lightly grounded.
It really doesn't matter, so go with what is most comfortable for you.
Muscle activation is primarily the gluteus, back, and hamstrings, with some stimulus for your core, biceps, shoulders, and traps too.
Depending on how big the load becomes over time, the bigger the load, the bigger the global stimulus.
Amazing job, enjoy a final optional aerobic session and a well-deserved few recovery days before the weekly gym plan starts over with 3 days of exercise next week again.
Yes, weekly fitness keeps going for all of life, and that's how your wonderful healthy fit habits create those monumental health and body benefits in every study and super fit N1 example you have ever seen.
.

Optional
Aerobic Exercise
Longer but slower run
20 to 60 minutes
Heavy bag boxing workout
Optional aerobic interval session once done with the first 3 groups
Coach input: Longer but slower run or heavy bag boxing session, day three.
Time for a longer, but much slower and calmer walk and run session compared to our first two gym days this week.
Slow run as much of it as you can. But walk if/when needed, the goal with this session is not to exhaust yourself with speed and explosive effort, but to get productive, easy to recover from aerobic volume.
If you are not in the mood for a run, or if you are too beat up in run-specific areas and muscles, replace your entire running session with a superb heavy bag workout and go easier with the power as you focus on movement and technique instead.
Heavy boxing bag session.
We are talking about any kind of martial arts preference, body combat, or whatever you call it.
Work the bag for 20 to 60 minutes for this day 3 finisher.
But treat today as a lower-effort session.
Go hard with kicks, punches, elbows, and knees in a small amount of volume today.
In between each hard wave, keep at it, but at a lower, and kinder pace, less explosiveness, less intensity, less power, and more technique.
This is your combat sports zone 1/2, and it will let you ramp up productive skill and fitness building, aerobic and muscle-stimulating volume while recharging your body for the next wave of higher intensity effort.
Unlike running, combat sport workouts provide excellent full body agility, better balance, flexibility, and athleticism too, all while also providing cognitive benefits.
And that makes for one fun and highly beneficial bonus, wouldn't you say?
Martial arts exercise ideas.
If you are looking for a good exercise to weave into your strength training or boxing session that can help you increase muscular endurance, flexibility, and balance, check out our standing lateral leg raise exercise from our exercise library. It's one of the day 3 alternate exercises, too.
.
Day 3 variants.
Nope, I did not forget about our day 3 variants. Most of day 3 just makes use of different exercise combos from earlier in the week.
Allowing you to create a better, more individually tailored week-long gym plan without becoming one of our paying clients.
But I will briefly touch upon two alternatives for day three.
The body weight JM press.
You know how to do the JM press; we detailed that earlier in this fitness plan.
So just focus on your triceps and really bracing your core. Do it one arm at a time, if needed, pushing that hand through the floor, rising up on a straight arm before you do the other arm.
This is not needed; you can do both arms at the same time.
But I genuinely find that most people have a much easier, more comfortable time with this version of the JM press when done 1 arm at a time. Yes, the JM press is harder than regular pushups, and doing both hands at the same time is even harder than doing it 1 arm at a time.
The bodyweight handstand pushup.
The bodyweight handstand pushup is such a hard exercise, both strength-wise, and technically speaking.
I strongly recommend that you to not try the handstand pushup at all, unless you dominate the elevated flipped V pushup with ease.
If you can do weighted flipped V pushups in the 25+ rep range, by all means, you are, from a strength perspective absolutely ready for the bodyweight handstand pushup; if not, you should choose the flipped V pushup instead.
Once you are ready strength-wise, start by using a wall as your balancing support. You can do this either with your face facing the wall or facing away from the wall.
The latter is for most the easier option since it allows you to get into the crow or the flipped V pushup, and then walk your feet up to the wall to a handstand.
I also strongly recommend that you use a thick towel, or two, on the ground for your head when you start out.
It's a hard exercise strength-wise, and you just don't know when you will crash headfirst into the ground. Other than that, keep your gluteus and core braced, breathe in at the top, and dare to challenge yourself at the bottom position.
This one doesn't need many reps, so do it properly.
And yes, you can use the backpack, but very few will need the weighted option for this one.
.
Exercise Day One & Two are available in two separate articles, link down below.
At Strength By Fitness we publish our public and member only fitness plans with one individual article per exercise day.
This is day three of this particular bodyweight & outdoor gym based fitness plan. You can find our first two exercise days of this weekly plan down below.
Fitness Plan:
Exercise days 1 & 2
Day One
Day Two
Unless strength training is your main pillar for health, fitness, or sports performance, something beats nothing with a gigantic margin. As such, even just 20 to 40 minutes done 2/3 days per week will create substantial progression when that time is wisely spent.
Coach Mike, Strength By Fitness.
recent articles

Public Article: Exercise Effort & Volume. Can it be too much?
Are there any downsides to a very large weekly exercise volume, YES, read on to find out as we take a look at lifetime exercise volume and its heart health impact., Welcome readers to this free to read Strength By Fitness article.
Coaching & Personal Training: Online, In-person, & Hybrid
You can be a Strength By Fitness client in several ways: In-person at Cape Quarter, Zone Fitness, and online, no matter where in the world you live. Or combine both in-person & online for a world-class all-year-round hybrid coaching client-coach journey.

Member Exclusive Article: Energy Expenditure, Everything You Need to Know.
Habits always matter because that is what drives the direction of your trajectories. Welcome to a fact-based article on energy expenditure from Strength By Fitness.

Member Exclusive Recipe: Home-made Crispy Cold Tofu Mix. High-Protein, Higher-SPC
Strength By Fitness presents a homemade, crispy, fried, and cold tofu mix. This is one more trademark High-protein and higher-SPC recipe, loaded with health and fitness-friendly nutrients per unit of energy.
Nutrients: Protein 89g, Fiber 50g, and SPC range of 51 to 65.
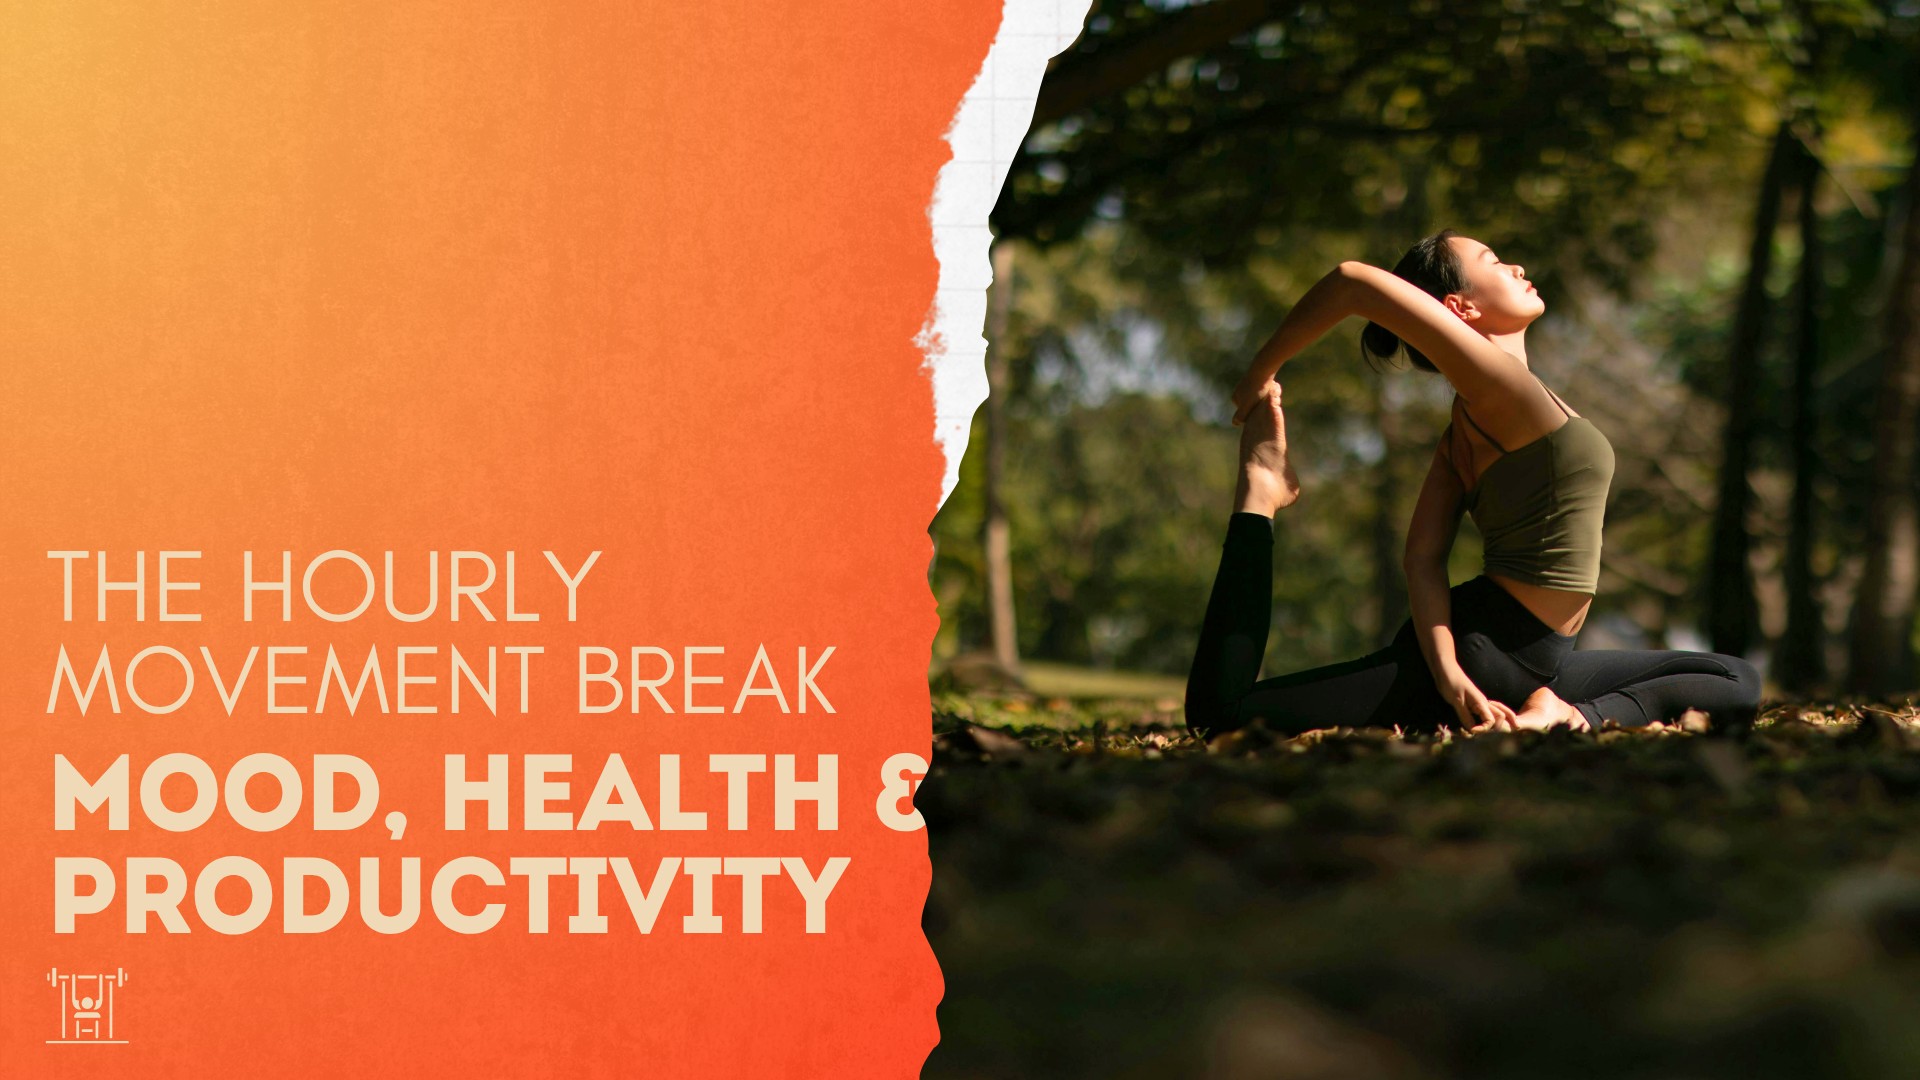
The Hourly Movement Break: A Mood, Health and Productivity Boosting Habit
Post-meal & hourly 5-minute movement activities make for an easy daily client habit with measurable benefits. Welcome to another fact-based & free to read, public Strength By Fitness article.

Home-made & Creamy, Chocolate Pudding: Higher-SPC, Fiber & Protein Rich.
Our body-composition, health, and fitness-friendly creation this time is a fiber and micronutrient-rich chocolate pudding that happens to be as packed with protein as it is deliciously decadent, thick, and creamy. 151G Protein, 97G Fiber, and a SPC range of 66 to 80.
We appreciate you
so stay healthy & never stop training
Contact
Private In-App Messaging is Available For All App + Coaching Clients
Adress
Coaching Is Available Online Via App on IOS & Google Play, and In-person, On-location.
Copyright 2026 Strength By Fitness.